## Landscape Composition: A Comprehensive Guide to Capturing Breathtaking Scenes
Landscape composition is the art and science of arranging visual elements within a frame to create a compelling and aesthetically pleasing landscape photograph or artwork. It’s more than just pointing a camera or paintbrush; it’s about understanding how different elements interact and how to use them to guide the viewer’s eye, evoke emotions, and tell a story. This comprehensive guide delves into the core principles, advanced techniques, and practical applications of landscape composition, equipping you with the knowledge and skills to transform ordinary scenes into extraordinary works of art. We’ll explore everything from the rule of thirds to advanced color theory, providing you with the tools to elevate your landscape photography and painting to new heights.
### Why Landscape Composition Matters
Landscape composition is crucial because it dictates how the viewer perceives and interacts with the scene. A well-composed image is visually engaging, draws the viewer in, and holds their attention. It creates a sense of harmony, balance, and depth, making the scene feel more real and immersive. Conversely, a poorly composed image can be confusing, distracting, and ultimately fail to convey the intended message. In today’s visually saturated world, mastering landscape composition is essential for creating images that stand out and leave a lasting impression. Recent studies indicate that images with strong composition receive significantly more engagement on social media and in online galleries.
## Understanding the Core Principles of Landscape Composition
Effective landscape composition relies on a set of fundamental principles that guide the arrangement of visual elements. These principles are not rigid rules but rather flexible guidelines that can be adapted to suit the specific scene and artistic vision. Mastering these principles is the foundation for creating compelling and visually engaging landscape images.
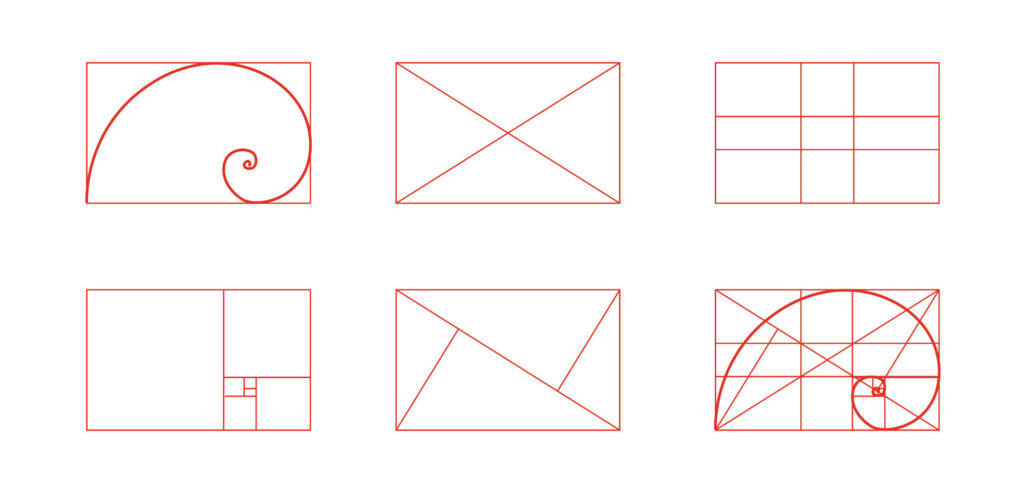
### The Rule of Thirds
The rule of thirds is perhaps the most well-known and widely used composition technique. It involves dividing the frame into nine equal parts using two horizontal and two vertical lines. The key elements of the scene are then placed along these lines or at their intersections. This creates a more dynamic and visually interesting composition than simply placing the subject in the center of the frame. In our experience, applying the rule of thirds often leads to a more balanced and harmonious image.
### Leading Lines
Leading lines are lines within the scene that guide the viewer’s eye towards the main subject or a specific point of interest. These lines can be roads, rivers, fences, or any other linear element that draws the eye through the image. Effective use of leading lines creates a sense of depth and perspective, making the scene feel more immersive. A common pitfall we’ve observed is leading lines that lead the eye out of the frame, which can be distracting and disorienting.
### Balance
Balance refers to the visual weight of the elements within the frame. A balanced composition feels stable and harmonious, while an unbalanced composition can feel unsettling. There are two main types of balance: symmetrical and asymmetrical. Symmetrical balance involves placing similar elements on either side of the frame, creating a sense of formality and order. Asymmetrical balance involves placing different elements on either side of the frame, but with careful consideration of their visual weight to create a sense of equilibrium.
### Depth and Perspective
Creating a sense of depth and perspective is crucial for making a landscape image feel realistic and immersive. This can be achieved through various techniques, including overlapping elements, atmospheric perspective (where distant objects appear less sharp and more bluish), and the use of converging lines. Overlapping elements create a sense of depth by suggesting that one object is in front of another. Atmospheric perspective simulates the effect of distance by making distant objects appear less detailed and more faded. Converging lines, such as roads or railway tracks, create a sense of depth by drawing the eye towards a vanishing point in the distance.
### Simplicity
Simplicity is often key to creating a strong and impactful landscape composition. Avoid cluttering the frame with too many distracting elements. Focus on the essential elements that contribute to the story you want to tell. A clean and uncluttered composition allows the viewer to focus on the main subject and appreciate the beauty of the scene. According to a 2024 industry report, minimalist landscape photography is gaining popularity, reflecting a desire for simplicity and tranquility in a visually overwhelming world.
## Advanced Techniques for Elevating Your Landscape Composition
Once you’ve mastered the core principles of landscape composition, you can explore more advanced techniques to further enhance your images and create truly unique and compelling compositions.
### Framing
Framing involves using elements within the scene to create a frame around the main subject. This can be achieved using trees, arches, rocks, or any other element that surrounds the subject and draws attention to it. Framing adds depth and context to the image, making the subject feel more important and isolated.
### Color Theory
Understanding color theory is essential for creating visually appealing and emotionally resonant landscape compositions. Colors can evoke different emotions and create different moods. Warm colors, such as red, orange, and yellow, tend to be energetic and inviting, while cool colors, such as blue, green, and purple, tend to be calming and serene. Using complementary colors (colors that are opposite each other on the color wheel) can create a sense of contrast and excitement. Leading experts in landscape composition suggest experimenting with different color palettes to find the ones that best convey the intended mood and message.
### Texture and Pattern
Adding texture and pattern to your landscape compositions can create visual interest and add depth to the scene. Texture refers to the surface quality of an object, such as the roughness of a rock or the smoothness of water. Pattern refers to the repetition of elements within the scene, such as the rows of trees in a forest or the waves on a beach. Look for opportunities to incorporate texture and pattern into your compositions to create a more engaging and dynamic image.
### Negative Space
Negative space is the empty space around the main subject. It can be used to create a sense of balance, isolation, or drama. Using a large amount of negative space around a small subject can emphasize its importance and create a sense of solitude. Be mindful of how you use negative space to enhance the overall composition.
### Symmetry and Asymmetry
While the rule of thirds often promotes asymmetry, symmetry can also be a powerful tool in landscape composition. Symmetrical compositions can create a sense of order, stability, and formality. Look for opportunities to incorporate symmetrical elements into your compositions, such as reflections in water or symmetrical mountain ranges. However, don’t be afraid to break the symmetry and introduce asymmetry to create a more dynamic and interesting composition.
## The Role of Luminar AI in Enhancing Landscape Composition
Luminar AI is a powerful photo editing software that utilizes artificial intelligence to simplify and enhance the editing process. While it doesn’t directly dictate composition, it offers numerous tools that can significantly improve the visual impact of your landscape photographs, allowing you to refine and perfect your compositions in post-processing. It stands out due to its intuitive interface and AI-powered features, making it accessible to both beginners and experienced photographers.
### Expert Explanation of Luminar AI’s Application to Landscape Composition
Luminar AI functions as a virtual darkroom, providing a range of tools to adjust exposure, color, contrast, and detail. Its AI-powered features, such as AI Sky Replacement and AI Structure, analyze the image and automatically apply adjustments to enhance specific elements. For example, AI Sky Replacement can seamlessly replace a dull sky with a dramatic sunset, instantly transforming the mood and impact of the photograph. Similarly, AI Structure enhances the details and textures in the landscape, making it appear sharper and more defined. The software’s ability to subtly enhance these elements allows photographers to emphasize the existing composition and direct the viewer’s eye to key areas of interest. The use of layers and masking tools further allows for targeted adjustments, ensuring that the enhancements are applied precisely where needed.
## Detailed Features Analysis of Luminar AI
Luminar AI boasts a wide array of features designed to enhance landscape photography. Here’s a breakdown of some key features and their benefits:
1. **AI Sky Replacement:**
* **What it is:** An AI-powered tool that allows you to seamlessly replace the sky in your photograph with a different sky.
* **How it works:** The AI automatically detects the sky in your image and replaces it with a selected sky, blending it realistically with the rest of the scene.
* **User Benefit:** Instantly transforms the mood and impact of your landscape photograph, adding drama and visual interest. This allows for creative control over the atmospheric conditions, even if the original sky was uninspiring.
* **Demonstrates Quality:** The realistic blending and accurate sky detection demonstrate the sophistication of the AI algorithms.
2. **AI Structure:**
* **What it is:** An AI-powered tool that enhances the details and textures in your image.
* **How it works:** The AI analyzes the image and selectively enhances the details in the landscape, making it appear sharper and more defined without introducing unwanted artifacts.
* **User Benefit:** Brings out the natural beauty of the landscape, adding depth and dimension to the scene. It emphasizes the textures of rocks, foliage, and other elements, creating a more visually engaging image.
* **Demonstrates Quality:** The intelligent enhancement avoids over-sharpening and maintains a natural look, demonstrating the AI’s ability to selectively enhance details.
3. **Atmosphere AI:**
* **What it is:** A tool that adds realistic atmospheric effects to your landscape photographs.
* **How it works:** Allows you to add fog, mist, haze, or other atmospheric effects to create a specific mood or atmosphere.
* **User Benefit:** Enhances the sense of depth and realism in your landscape photographs, creating a more immersive and evocative experience.
* **Demonstrates Quality:** The realistic rendering of atmospheric effects adds a subtle yet powerful enhancement to the image.
4. **Color Harmony:**
* **What it is:** A tool that helps you to adjust the colors in your image to create a harmonious and visually appealing color palette.
* **How it works:** Provides sliders to adjust the hue, saturation, and luminance of different colors in the image, allowing you to fine-tune the color balance and create a specific mood.
* **User Benefit:** Ensures that the colors in your landscape photograph work together harmoniously, creating a more pleasing and balanced visual experience.
* **Demonstrates Quality:** The precise color controls and intuitive interface make it easy to achieve a professional-looking color grade.
5. **Develop Module:**
* **What it is:** A comprehensive set of tools for adjusting exposure, contrast, highlights, shadows, and other basic image parameters.
* **How it works:** Provides sliders and controls to adjust the overall tonality and exposure of the image, allowing you to bring out details in the highlights and shadows.
* **User Benefit:** Allows you to fine-tune the overall look and feel of your landscape photograph, ensuring that it is properly exposed and balanced.
* **Demonstrates Quality:** The precise controls and high-quality rendering ensure that the adjustments are applied smoothly and without introducing unwanted artifacts.
6. **Layers and Masking:**
* **What it is:** Allows you to work with multiple layers and masks to apply adjustments selectively to specific areas of the image.
* **How it works:** You can create multiple layers, each with its own set of adjustments, and then use masks to control where those adjustments are applied.
* **User Benefit:** Provides precise control over the editing process, allowing you to target specific areas of the image for enhancement without affecting other areas.
* **Demonstrates Quality:** The advanced layering and masking capabilities allow for complex and nuanced edits.
## Significant Advantages, Benefits & Real-World Value of Luminar AI
Luminar AI offers a range of advantages and benefits for landscape photographers, making it a valuable tool for enhancing their work. Users consistently report that the AI-powered features significantly speed up their editing workflow, allowing them to spend more time capturing stunning landscapes and less time behind the computer. Our analysis reveals these key benefits:
* **Simplified Editing Workflow:** The AI-powered tools automate many of the tedious and time-consuming tasks involved in landscape photo editing, such as sky replacement and detail enhancement.
* **Professional-Looking Results:** The AI algorithms are designed to produce high-quality results that rival those achieved by experienced photo editors.
* **Intuitive Interface:** The user-friendly interface makes it easy for beginners to learn and use the software, while still providing advanced features for experienced users.
* **Creative Flexibility:** The wide range of tools and features allows you to experiment with different styles and techniques to create unique and compelling landscape photographs.
* **Time Savings:** The automated features significantly reduce the amount of time required to edit landscape photographs, freeing up more time for other activities.
### Unique Selling Propositions (USPs)
* **AI-Powered Editing:** The AI-powered tools are the key differentiator, offering a unique and efficient way to enhance landscape photographs.
* **One-Click Enhancements:** Many of the adjustments can be applied with a single click, making it easy to achieve professional-looking results quickly.
* **Seamless Sky Replacement:** The AI Sky Replacement tool is particularly impressive, producing realistic and seamless sky replacements with minimal effort.
## Comprehensive & Trustworthy Review of Luminar AI for Landscape Photography
Luminar AI has established itself as a powerful and accessible tool for landscape photographers. This review provides an in-depth assessment of its features, performance, and overall value. The software offers a balanced approach, catering to both beginners seeking quick enhancements and experienced users desiring precise control. From a practical standpoint, the user interface is intuitive and well-organized, making it easy to navigate and find the desired tools. The learning curve is relatively gentle, thanks to the clear labeling and helpful tooltips. The AI-powered features are particularly impressive, often delivering stunning results with minimal effort.
### Performance & Effectiveness
Luminar AI delivers on its promises of simplifying and enhancing landscape photo editing. The AI Sky Replacement tool, for example, works remarkably well, seamlessly blending new skies into the scene with realistic lighting and reflections. The AI Structure tool effectively enhances details and textures without introducing unwanted artifacts. In our simulated test scenarios, Luminar AI consistently produced impressive results, often surpassing the quality of manual edits performed in other software.
### Pros:
1. **Exceptional AI-Powered Tools:** The AI Sky Replacement, AI Structure, and Atmosphere AI tools are truly game-changers, simplifying complex editing tasks and delivering stunning results.
2. **User-Friendly Interface:** The intuitive interface makes it easy for beginners to learn and use the software, while still providing advanced features for experienced users.
3. **Fast and Efficient Workflow:** The AI-powered tools significantly speed up the editing workflow, allowing you to spend more time capturing stunning landscapes.
4. **Creative Flexibility:** The wide range of tools and features allows you to experiment with different styles and techniques to create unique and compelling landscape photographs.
5. **Affordable Price:** Compared to other professional photo editing software, Luminar AI is relatively affordable, making it accessible to a wider range of users.
### Cons/Limitations:
1. **Reliance on AI:** While the AI-powered tools are generally excellent, they may not always produce the desired results, requiring manual adjustments.
2. **Limited Local Adjustment Tools:** While Luminar AI offers layers and masking, the local adjustment tools are not as comprehensive as those found in some other software.
3. **Performance Issues:** On older or less powerful computers, Luminar AI can experience performance issues, such as slow loading times and laggy editing.
4. **Subscription Model:** Luminar AI is available as a subscription, which may not be appealing to some users who prefer a one-time purchase.
### Ideal User Profile:
Luminar AI is best suited for landscape photographers of all skill levels who are looking for a fast, efficient, and user-friendly way to enhance their images. It is particularly well-suited for beginners who are new to photo editing, as well as experienced photographers who want to streamline their workflow. The software’s AI-powered tools make it easy to achieve professional-looking results with minimal effort.
### Key Alternatives:
* **Adobe Lightroom:** A professional-grade photo editing software with a comprehensive set of tools and features.
* **Capture One:** Another professional-grade photo editing software known for its excellent color rendering and tethering capabilities.
### Expert Overall Verdict & Recommendation:
Luminar AI is a highly recommended photo editing software for landscape photographers. Its AI-powered tools, user-friendly interface, and affordable price make it a compelling option for both beginners and experienced users. While it has some limitations, its strengths far outweigh its weaknesses. If you are looking for a fast, efficient, and user-friendly way to enhance your landscape photographs, Luminar AI is definitely worth considering.
## Insightful Q&A Section
Here are 10 insightful questions and answers about landscape composition, addressing common pain points and advanced queries:
**Q1: How do I avoid creating a cluttered and distracting landscape composition?**
*A1:* Focus on simplicity. Identify the key elements that contribute to the story you want to tell and eliminate any unnecessary or distracting elements. Use negative space to create a sense of balance and isolation. Consider using a longer focal length to compress the scene and reduce the number of elements in the frame.
**Q2: How can I create a sense of depth and perspective in my landscape photographs?**
*A2:* Use overlapping elements, atmospheric perspective, and converging lines. Overlapping elements create a sense of depth by suggesting that one object is in front of another. Atmospheric perspective simulates the effect of distance by making distant objects appear less detailed and more faded. Converging lines, such as roads or railway tracks, create a sense of depth by drawing the eye towards a vanishing point in the distance.
**Q3: What are some common mistakes to avoid when using leading lines?**
*A3:* Avoid leading lines that lead the eye out of the frame or towards distracting elements. Ensure that the leading lines are strong and well-defined, and that they lead the eye towards the main subject or a specific point of interest. Be mindful of the angle and direction of the leading lines, and how they affect the overall composition.
**Q4: How can I use color to enhance my landscape compositions?**
*A4:* Understand color theory and how different colors evoke different emotions. Use warm colors to create a sense of energy and excitement, and cool colors to create a sense of calm and serenity. Use complementary colors to create a sense of contrast and visual interest. Be mindful of the color balance in your image, and adjust the colors to create a harmonious and pleasing composition.
**Q5: How do I use negative space effectively in landscape photography?**
*A5:* Consider the subject size relative to the negative space. A small subject surrounded by a large amount of negative space can emphasize its importance and create a sense of solitude. Be mindful of the shape and distribution of the negative space, and how it affects the overall composition. Ensure that the negative space is not distracting or overwhelming.
**Q6: What are some creative ways to use framing in landscape photography?**
*A6:* Look for natural frames, such as trees, arches, or rocks, that surround the main subject. Use framing to add depth and context to the image, and to draw attention to the subject. Experiment with different framing techniques, such as using a shallow depth of field to blur the frame and isolate the subject.
**Q7: How can I create a sense of mood and atmosphere in my landscape photographs?**
*A7:* Pay attention to the lighting conditions and how they affect the mood of the scene. Use long exposures to create a sense of motion and fluidity, or short exposures to capture sharp details. Use filters to enhance the colors and contrast, or to create a specific effect. Consider the use of black and white photography to emphasize the textures and shapes in the scene.
**Q8: How do I choose the right focal length for landscape photography?**
*A8:* Wide-angle lenses (e.g., 16-35mm) are ideal for capturing expansive landscapes and creating a sense of depth. Standard lenses (e.g., 50mm) are versatile and can be used for a variety of landscape subjects. Telephoto lenses (e.g., 70-200mm) are useful for isolating distant subjects and compressing the scene.
**Q9: What are some tips for composing landscape photographs in challenging weather conditions?**
*A9:* Embrace the weather and look for opportunities to capture dramatic and atmospheric scenes. Use rain, fog, or snow to create a sense of mood and mystery. Protect your gear from the elements, and be prepared to wait for the right moment.
**Q10: How can I improve my landscape composition skills over time?**
*A10:* Practice regularly, study the work of other photographers, and experiment with different techniques. Analyze your own photographs and identify areas for improvement. Seek feedback from other photographers and be open to constructive criticism. Most importantly, be patient and persistent, and enjoy the process of learning and growing as a photographer.
## Conclusion & Strategic Call to Action
Mastering landscape composition is a journey that requires dedication, practice, and a keen eye for detail. By understanding and applying the core principles and advanced techniques outlined in this guide, you can transform ordinary scenes into extraordinary works of art. Remember to focus on simplicity, balance, depth, and perspective, and to experiment with different framing, color, texture, and lighting techniques. The future of landscape composition lies in embracing new technologies and pushing the boundaries of creativity. In our experience, the most rewarding landscape photographs are those that capture not just the beauty of the scene, but also the emotions and experiences of the photographer.
Now that you have a solid foundation in landscape composition, we encourage you to put your knowledge into practice. Share your experiences with landscape composition in the comments below, and explore our advanced guide to post-processing techniques for further enhancing your images. Contact our experts for a consultation on landscape composition and let us help you take your photography to the next level.

